I was quite excited when our new MacPro arrived last week after 2 months of back order. Although it’s main use will be as an edit suite in the office I can see it becoming a regular traveller to some of the larger shows. As such I made it my job to spend some time trying various connections and resolutions in both OS-X and Windows. I had hoped it would be a quick post saying it all worked amazingly well but from initial testing those of us planning on using one (and a backup of course)  for shows will need to do extensive testing to make sure the little trashcan can do what it should.

The Machine –

  • 3.0GHz 8-Core Intel Xeon E5
  • 32GB 1866MHz DDR3 ECC – 4X8GB
  • 1TB PCIe-based Flash Storage
  • 2x AMD FirePro D700-6GB VRAM
  • OS-X 10.9.2
  • Windows 8

4K + 4K + 2k = OK

Apples promotional material mention support for up to 6x 1080 displays or 2x 4k Monitors. I unfortunately don’t have a  4k monitor to test the maximum output on let alone two but we do have a couple of bits of gear that can take some form of a 4k feed and at least indicate it’s working – in my case a Blackmagic ATEM 1M/E 4k and a Datapath X4 image wall processor.

So far I can confirm that the MacPro can handle more than just 2x 4k outputs (at 30hz) – in my case I had both outputs running at 3840×2160 and a 3rd monitor running at 1920×1080. I did load a 7680×2160 clip into Millumin and noticed some stutter but it could be to do with the outputs sub 50Hz refresh rate as the both the CPU and RAM reported low usage numbers.

This could all change with the release of 10.9.3 which has already show come quite bit improvements with both 60Hz  and HiDpi support coming to both the MacPro and 2013 rMBP.

Built in HDMI Out

Based on OS-X System Info this port is considered a Passive connection and so is considered 1 of your 2 passive connections available to use – want 2 outputs and an HDMI out? Well you’ll need an active adaptor to get them all to work. I’m also yet to get Windows to work with this port at all.

Active vs Passive Mini Displayport Adaptors
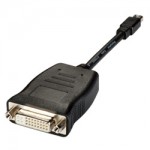
Active-Mini-DP-to-Single-Link-DVI-pig-tail-AdapterFirst off – Not all adaptors are created the same and if you want more than 2 outputs from a MacPro you’ll need ACTIVE adaptors. A quick eBay search shows the price difference.
Now from my experience (albeit by testing only a couple of options) not all active miniDP adaptors are the same either. I bought the cheapest active adaptors I could find and although they were fine for DVI they wouldn’t display HDMI in the right colour space in OS-X (although Windows was fine).
Also another note that all miniDP->VGA adaptors are active as they need to convert from a digital to analogue signal.

OS-X Quirks

OS-X has always been the weaker performer when it comes to GPU performance compared to Windows and even though the MacPro is a graphical powerhouse I’m still expecting the same app on either platform to perform at least 20% better on Windows.

First off – as previously mentioned – you can only use 2x generic miniDP->DVI/HDMI adaptors before you need to invest in Active adaptors. Plugging more screens won’t make any difference – they just won’t work. What’s weird/interesting is that 3+ passive adaptors will work in Windows.
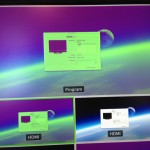
MacPro Active Out ProblemNow depending on which active adaptors you have will depend on how well they work – I have two to try – the official Apple Dual Link DVI adaptor ($NZ159) and a cheaper Wieson adaptor bought for $NZ40. When connecting DVI both work perfectly – but when connecting HDMI the Wieson used a weird colour profile and was unusable. The Apple one worked no matter which connection I used at the other end.

As OS-X doesn’t support AMD Crossfire each card is considered an individual card and all connections are routed from a single card (slot-1) with the other card (slot-0) never shows anything connected (as is also the case in Windows).

Windows Quirks

The new MacPro supports only Windows 8.1 so despite me hoping to avoid that turd I’ve been forced to give it a whirl. For now I’ve only used the bootcamp gfx drivers but apparently you can also install the current AMD drivers. I’ve also enabled CrossFire so both cards should work as one.

First off – never expect your outputs to be laid out the same on reboot. What was your primary display on one boot may completely shift to another output on reboot. This is a major pain for those of use wanting things to be exactly as they just were (crazy I know). With no primary connection any port seems to be chosen at random to be your primary screen.

Even though I got 6x 1080 outputs correctly working in Windows 8.1 eventually, upon rebooting all previous resolutions were lost (except for the 2x connected monitors) and no amount of replugging order would work to get back to 1080 output being an option for the 4x feeds going into our Blackmagic 1M/E switcher. Even trying another brand HDMI->SDI adaptor wouldn’t help Windows set the output resolution to 1920×1080. 

Wrap Up

So there you have it – lots of little issues but once some bugs are fixed, hopefully soon, the Mac Pro should make for quite the playback machine for gigs that need lots of outputs from a single computer.
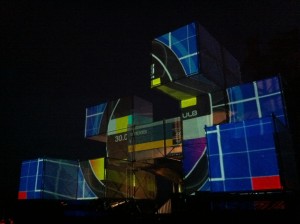
Splore DJ Zone 2012 Disaster Radio

Splore 2014 is fast approaching and with great acts like Ebony Bones and Adam Freeland having been so far announced, Splore is once again shaping up to be the best little arts festival this side of the equator. Do check the official site out for more event information and an extended line up.

So as we’re busy developing this years stage designs we are now calling for VJ applications to perform.

As with previous years, 2014 Splore will have a focus on curating tightly with VJs to musical acts and we are once again calling for some sort of supportive video content to assist with assigning sets. Please include a link or file in your submission – the clip could be something that sums your style up in 10 seconds or a full show reel.

VJ submissions should be emailed to splore@lotech.co.nz with the following info. Please include the word SUBMISSION in the subject.


SUBMISSIONS

NAME

VJ NAME

BIO: Some information about you, where you’ve performed etc…

PICTURE/IMAGE/LOGO

SHOWREEL/CLIP:  Either a link or attached file.

VJ slots at Splore are extremely limited and we have set a cut off date for submissions of 7 November – don’t miss out.

(LT) Quick FX Easter Egg (LT) Quick FX Easter Egg

When I made (LT) QuickFX v1.1 I not only wanted to make a FX module that only had Effects I wanted to use but also display them in a  relatively uncluttered way. Before then the best way of accessing effects was via (AT) Filter (layer) V1.6.1 which gave you a huge list of all the system plugins that Modul8 supported.

What many don’t realise is that Modul8 supports any Core Image effects that are installed – not just the builtin Modul8 or FreeFrame 1.0 plugins. As a result I could use some of the great OS once in QuickFX – CMYK Halftone and Kaleidoscope being good examples.

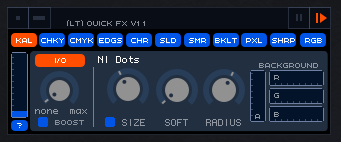
Of course this doesn’t just have to be system FX – any third party CI FX will show up (but not always work). One 3rd Party effect I’ve always loved is (NI) Dots. It’s part of Noise Industries FxFactory, a commercial plugin pack for NLEs and AE. I liked it so much so that I actually ended up including it into QuickFX – but never told anyone.

Dots is basically a really nice circular pixel effect which I’ve found looks great on a LED walls behind a DJ/Band. You can control Size, Spacing, Scale and Background Colour.

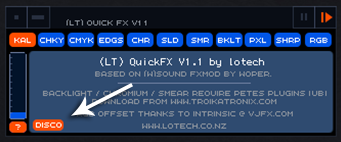
So. How do you access it? Well its not exactly hidden (no Konami code necessary) to access it go to the ? button and then press the DISCO.

(LT) Quick FX Easter Egg QuickFXEE04

You’ll of course need to have a copy of FXFactory installed (which is free to download). I’m unsure if it will continue to work once your trial period is over. If you do give it a try please do post what happens after the 15 day trial runs out so I can update this post.

I’ve tested this using the original v3 of FxFactory and just now on the newer v4.0.6.

Thanks to all those who came. It was one of the best events I’ve ever worked on.
A roll call of VJs –
Lotech
dubmodule
darkroom.tv
WarpTV
DurtyMac
TommeeT
Jem the Misfit
Lupavision
subcut
test-tube.tv
wired visual
Interrupt Collective
C6
& Wanderer Productions.

Check http://forum.garagecube.com/viewtopic.php?f=23&t=8130 for some other pics.

Below are a few clips from the weekend.

Dubmodule’s Topographical Delineation

Jemthemisfit:

Darkroom.tv:
http://vimeo.com/37653713

Splore 2012 is approaching fast and is looking to be the most exciting one so far. With international music artists including Erykah Badu, Soul II Soul and Hudson Mohawke there’s lots to be excited about.

Visuals wise, for 2012 lotech and Dub Module (Mike Hodgson) are working closely to make this a special event for VJs and video artists too. The biggest video development will be a video mapped environment in the DJ stage. We plan to release a collection of masks and some instructions soon. This should help VJs prepare or create original content for this very awesome setup.

We’re still working through the technical and design elements of this but it should still allow for VJs to step up and do an original mapped show or a traditional mixed VJ set via a vision switcher.

Oh, and lastly – as mapping is pixel accurate it is highly recommended that VJs use HD based clips for performance – so if you haven’t updated your set recently – now is a good time to do so.

Simon


SUBMISSIONS

Splore 2010 received great feedback from not only the public but also the artists themselves on how the visual content was so perfectly aligned to the sound. So once again we are calling for VJ showreels to help with assigning sets. It could be a clip that sums your style up in 10 seconds or a full show reel – this helps us to truly curate the VJs and really tie a VJ to an artist.

It also goes without saying there are limited sets over the course of the weekend, last Splore we had almost twice the submissions for VJ sets than we were able to fill. Please understand if you miss out.

VJ submissions can be emailed to splore@lotech.co.nz with the following info. Please include the word SUBMISSION in the subject.

NAME

VJ NAME

BIO: Some information about you, where you’ve performed etc…

PICTURE

SHOWREEL/CLIP:  Either a link or attached file.

I’ve updated my QuickFX module to v1.1. It adds support for (FF) RGB Offset, which is now available for free to use. A big thanks to Intrinsic for allowing me to include his plugin. The plugin is usually part of his Colmatic freeframe pack but he has graciously allowed me to include it in the module for free.
He has a whole lot of other great effects available to purchase on his website vjfx.com. Do check it out.

The module can be downloaded via Modul8’s online library and Intrinsic’s plugin can be downloaded from here: IscRGBOffset1_ub

Also – note that effects already included (Blacklight, Chromium & Smear) require Pete’s Plugins UB installed, they can be downloaded from here.

For as long as I’ve been VJing I’ve always been pining for a decent hardware controller to control our software. Unfortunately I’ve never found a controller that did everything right. Some were more appropriate than others but it was always a case of too many/too few buttons, dials or faders.

The original Lemur controller was a break through device – why not just a big touch screen for a controller? Unfortunately back then the Lemur was ahead of its time and its cost just made it an extravagance any normal VJ.

Fast forward to today and the Lemur has been re-imagined  in the form of Hexlers TouchOSC iOS & Android app. Users could draw up the layout they wanted and then sync them direct to the devices which in turn would send the OSC commands over Wifi.

From there you can use Modul8’s OSC Module to send and recieve commands. Unfortunately one downfall of this is that you’re limited to its internal Keyword for commands. As a result I’ve gone with the fantastic OSC translator OSCulator as an intermediatry between the iPad and Modul8. It allows you to assign Midi commands to be each OSC command. Another bonus is that is seamlessly supports Midi receiving so when used along side UDART’s Two Way Midi module you can have all your buttons in sync with their states on the screen.

A lot of the functionality included on this layout is  designed to be used in conjunction with my modules (LT) Live Monitor, Clip Control & QuickFX. Although they’re certainly not necessary and can just be deleted.

Continue reading

When someone uses any application for many years they inevitably come to find little annoyances with it. For me having used VJ app Modul8 for many years and for long periods, I certainly had my list. Unfortunately for me the developers work at a relatively glacial pace and improvements are few and far between (although a new release is coming later this month).

Thankfully when Garagecube created Modul8, they built the foundations strong and included a scripting back end that allowed users to extend Modul8s possibilities. With the creation of ‘modules’ someone could add basic functionality like a Beer/break reminder through to the ability to add Freeframe plugin support and to send and receive OSC commands.

It didn’t take long until I was running 6 modules, all in their own panel and made up of various shapes and sizes. It not only became confusing but when I ‘upgraded’ from a 17″ MBP to a 15″ model I suddenly had no space for all the modules.

Below is the results of my attempt to consolidate all the modules I had been using along with a few new features that I’ve created myself. I’m certainly no coder and its been a real head scratcher for a lot of the process but I’m pretty happy with the results. All the modules are designed for 2.6 only but other than audio reactive stuff probably work with v2.5 and can be downloaded from the Modul8 online library.

From this...

to this.


Continue reading

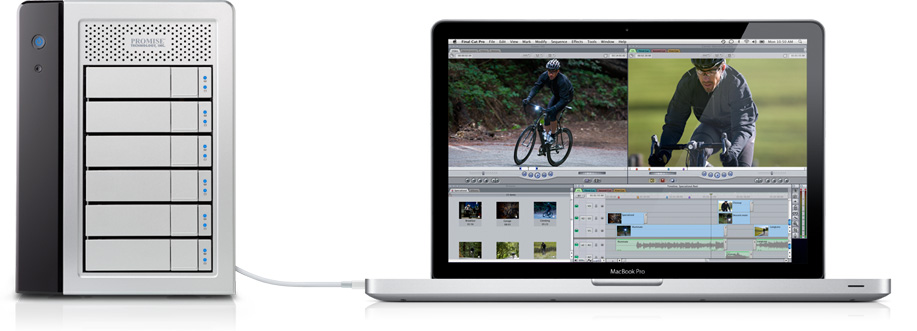
I must say I’ve very excited by Apple/Intel finally bring Lightpeak (now Thunderbolt) to market. Its a standard that should really move the whole connectivity part of computers forward.

As a video producer one of the big loses on Apple laptop line was the when they dropped Expresscard slots off 15″ MacBook Pros. We need a high speed connection that FW800 just can’t deliver – in fact we really need two – one for a RAID for content and another for either display output (not a graphics card) or for importing.
With Thunderbolt we can have up to four Expresscard speed devices running off one plug on even the cheapest unibody laptop.

Questions that I’m sure will be answered in good time:

  • Why does the new 13.3″ High end model list a 2.7Ghz i7 when the 17″ Model uses just a i7 2.2Ghz – are they different generations in chips?
  • Why do all MacBook Pros still only come with 5400rpm drives by default?
  • How long until a hub for Thundbolt comes out? How Much? I currently have to plug in Power, USBx2, FW800, Ethernet & Displayport when I get into work in the morning – I’m eager to cut this down to just power and Thunderbolt.
  • How long until updated CinemaDisplays that work as the above hub?
  • How long until iMacs are refreshed? Using Thumnderbolt the cost of a decent edit suit just dropped significantly, as just like the MBP line, as a video producer the biggest missing part on iMacs is a fast interconnect standard.
  • How long until the Mini (and all the others) are updated – weeks or months?
  • Infact more than anything – how awesome will the MacBook Air be once they add this. Its lack of ports just won’t matter.

UPDATE Engadget has more info along with some first products from LaCie and Promises – both drive enclosures – both featuring dual Thunderbolt plugs.

Now that I have my Mac Mini working seamlessly I wanted to have the normal Freeview 7 Day EPG, not just the 24hr one included in the stream. There was a handy scripted shared by Fossie on Geekzone but that was posted a few years ago and no longer works (as the geek.nz xml hosting was no longer live) so I took it on my self to fix it with the new location for the XML (now nzepg.org).

The attached Zip includes the updated script and and a compiled app of the same script. Both will do what you need to automatically download the xml.gz, uncompress and then send it to EyeTV. You can use iCal to automate it to run every week so your EyeTV is always up to date. Sweetbix.

EyeTV Freeview XMLTV Script (31kb)